With car shopping trends ever evolving in the Inland Empire, there’s an increasing need for residents to understand the basics of car maintenance. Whether you’ve just got a new car at Ontario Auto Center or are rolling with a trusty used car, one of the essential components that ensures your ride is smooth and uninterrupted is the fuel pump.
The fuel pump is like the heart of your vehicle. It pushes fuel from the tank to the engine. But like all components, wear and tear can take its toll, and you might need to replace it. Wondering how to get started? Here’s a step-by-step guide on how to replace a fuel pump.
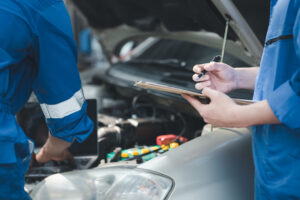
Before diving into the technicalities, ensure you’re in a well-ventilated area. If you’re not at one of the renowned service centers in Ontario or elsewhere in the Inland Empire, ensure you are away from open flames. Remember, you are dealing with fuel.
You can usually do this by removing the fuel pump fuse while the engine is running. Once the engine stops, you’ll know the pressure has been relieved. If in doubt, consulting your vehicle’s manual or reach out to a service professional.
Before removing the fuel pump, drain any excess fuel from the tank. It’s a crucial step to prevent any unwanted spills or accidents.
After disconnecting the negative battery cable, jack up your car securely. The location of your fuel pump will vary based on your car model, but it’s typically under the car near the fuel tank. After locating it, disconnect the fuel lines, remove the old pump, and then install the new one. If this sounds daunting, don’t fret! There are plenty of excellent service centers in the Inland Empire that can assist. Schedule a service today!
Before sealing everything up, turn on your car to ensure the new pump is working correctly. If you hear a smooth hum and your car starts without a hitch, you’re good to go.
Once you are satisfied with the installation, reconnect the negative battery cable and refuel your tank. Give the car another test run to ensure everything is in order.
Always opt for quality: While car shopping, especially for used cars, ensure that all parts, including the fuel pump, are of high quality.
Know when to call in the pros: If you are ever in doubt it is best to leave the job to professional Ontario and the Inland Empire region offer many reputable service centers.
Stay informed: Technology and car models evolve. Whether you are considering a new car or want to extend the life of your used car, always stay updated with the latest trends and techniques.
Don’t forget the filters: When replacing the fuel pump, it’s a good time to check and possibly replace the fuel filter as well. A clean fuel filter ensures your new pump has the best chance at a long life.
While great effort is made to ensure the accuracy of the information on this site, errors can occur. Please verify all pricing and installed equipment information with a customer service representative. This is easily done by calling us or visiting us at the dealership.
Customer may not qualify for ALL Rebates shown. Some rebates are stackable and others can and cannot be combined. See Dealer For Complete Details.
We improve our products and advertising by using Microsoft Clarity to see how you use our website. By using our site, you agree that we and Microsoft can collect and use this data. Our privacy statement has more details.
Save your favorite vehicles for later viewing on your desktop or mobile devices.
Keep track of all the vehicles you've viewed for a better car shopping experience.
Narrow your search by comparing your favorite vehicles.